📑 Table of Contents
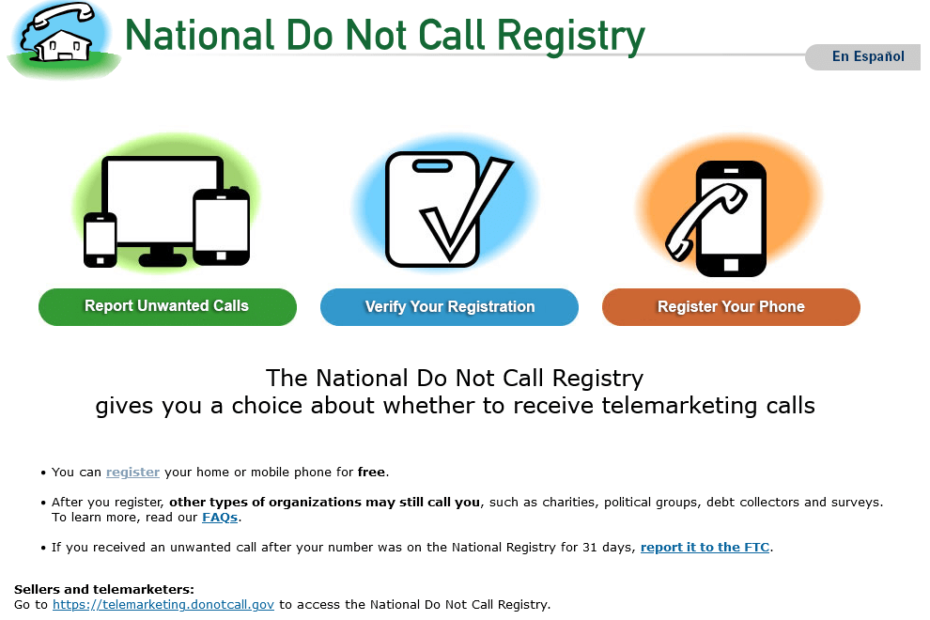
Tired of unwanted calls interrupting your day? The National Do Not Call Registry is your solution. By registering your phone number, you can significantly reduce telemarketing calls. The process is simple, and you can do it in just a few minutes. In this guide, we’ll walk you through the steps to register your phone number on the Do Not Call list.
Why Register for the Do Not Call List?
Before proceeding with the registration steps, it’s essential to understand why this list matters. Telemarketing calls can be a significant nuisance, invading your privacy and wasting your time. By registering, you can enjoy a quieter phone free from most unwanted solicitations. The Do Not Call Registry is a free service provided by the Federal Trade Commission (FTC), and it’s one of the most effective ways to regain control over your phone.
Step 1: Enter Your Phone Numbers and Email
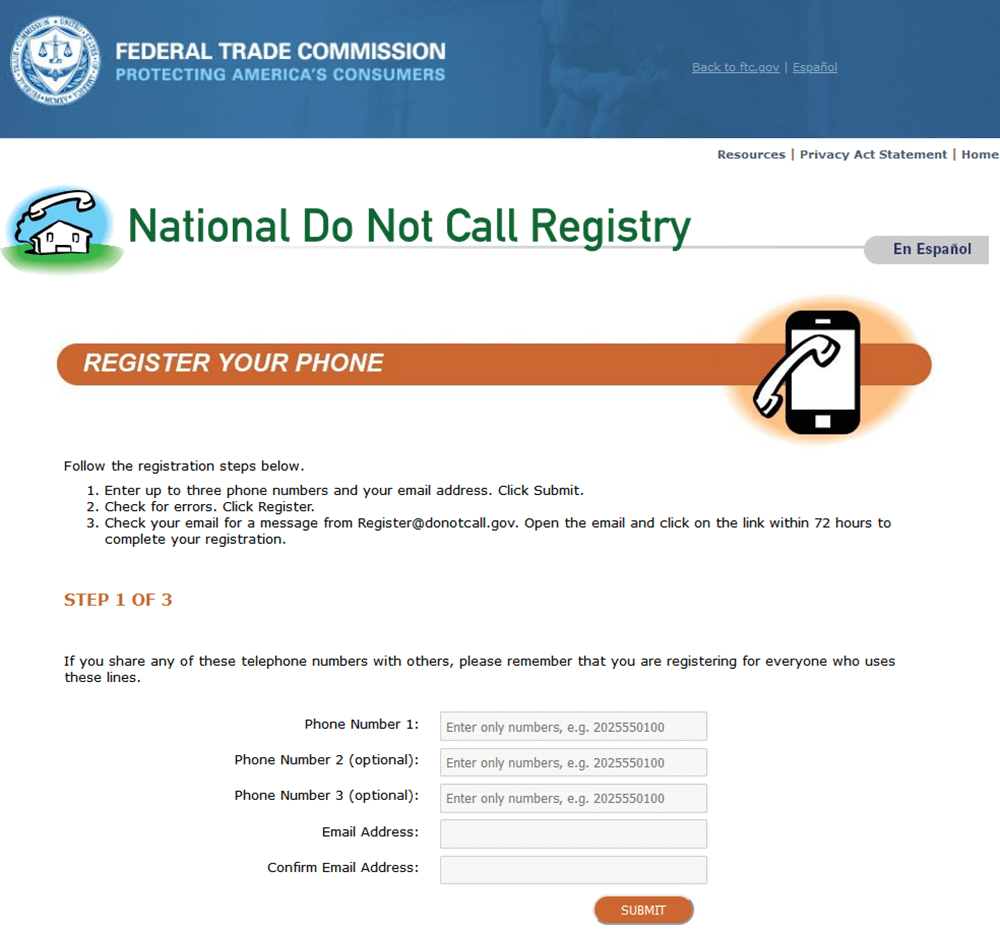
Start by visiting the official Do Not Call website at donotcall.gov. You’ll see an option to register your phone number on the homepage. You can enter up to three numbers at a time. In addition to your phone numbers, provide your email address. This is crucial for completing the registration process. Once you’ve filled in the details, click the “Submit” button.
Step 2: Check for Errors and Click Register
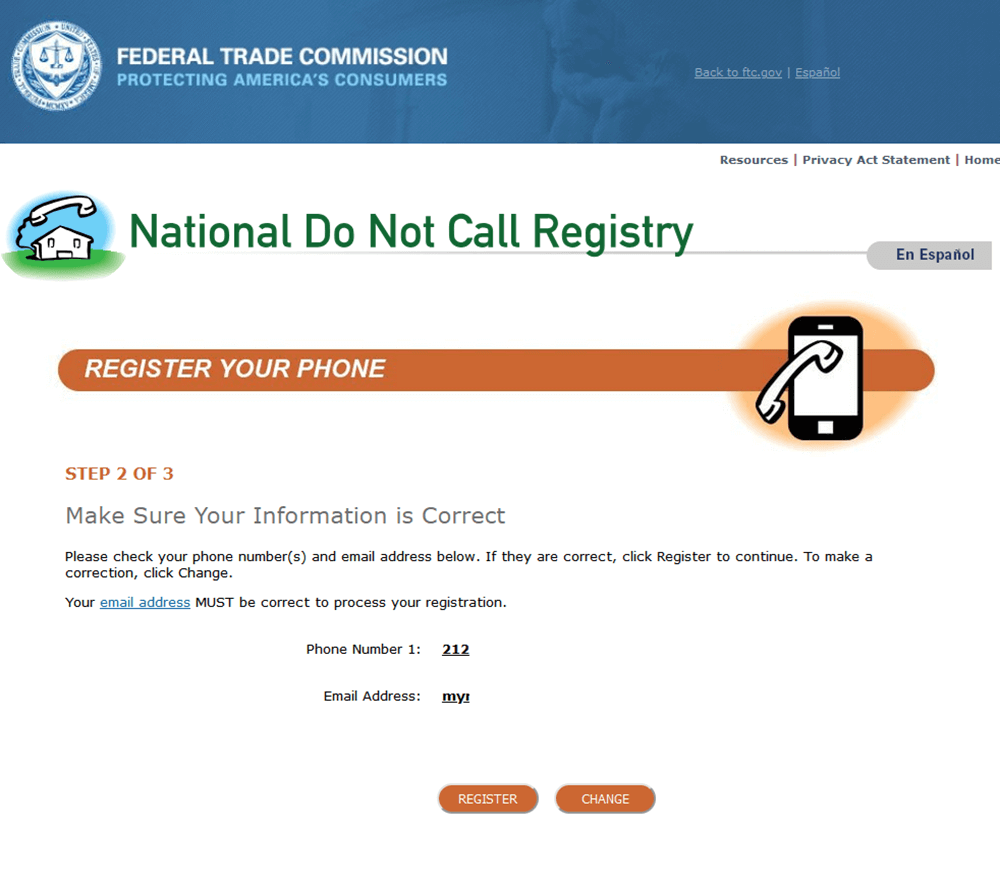
After submitting your information, the website will prompt you to review your entries. Double-check that all phone numbers and your email address are correct. If you spot any errors, now is the time to fix them. Accuracy is vital here, as even a small mistake could delay your registration. Once everything looks good, click the “Register” button.
Step 3: Look for the Confirmation Email
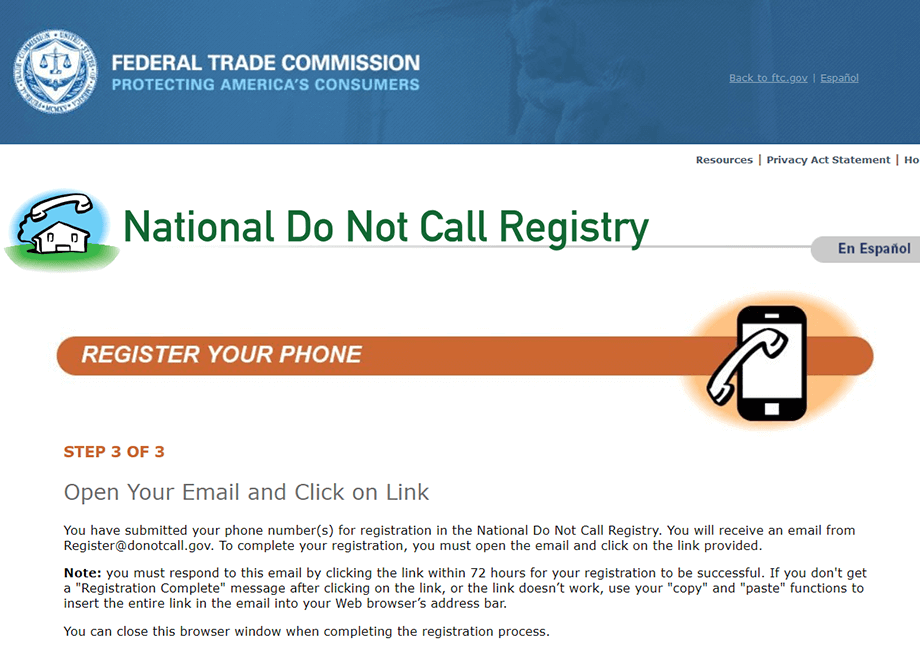
Within a few moments, you should receive a confirmation email from [email protected]. This email is crucial for completing your registration, so keep an eye on your inbox. Check your spam or junk folder if you don’t see the email immediately.
Step 4: Confirm Your Registration
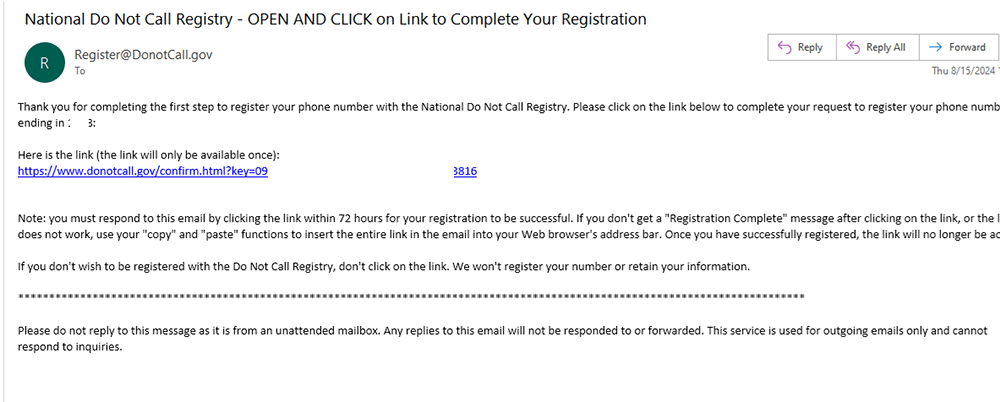
The confirmation email contains a link that you must click to finalize your registration. This step is time-sensitive, so do it within 72 hours of receiving the email. The link will direct you to the Do Not Call website, where you’ll see a confirmation message that your registration is complete.
Step 5: Completion and What to Expect Next
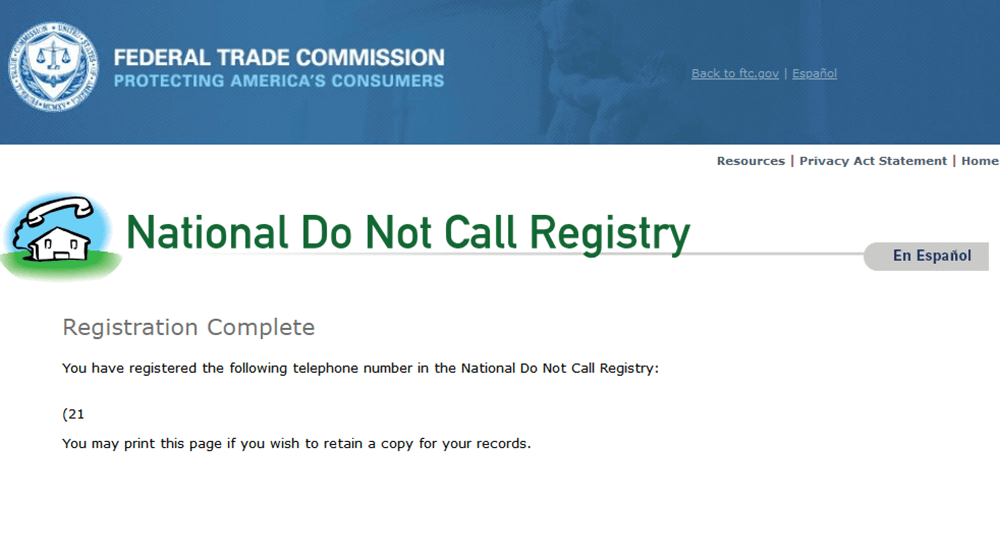
Congratulations! Your phone number is now registered on the Do Not Call list. It’s important to note that telemarketing calls may take up to 31 days to decrease. If you continue to receive unwanted calls after this period, you can file a complaint with the FTC through the same website.
What If I Need to Register More Numbers?
If you have more than three phone numbers, you can repeat the process. The system allows multiple registrations, so don’t worry if you have several lines to protect.
Tips for a Smooth Registration:
- Use a valid email address you frequently check.
- Complete the email confirmation as soon as possible.
- Keep a record of the phone numbers you’ve registered.
Wrap-up!
Registering for the Do Not Call list is a quick and easy way to reduce the number of telemarketing calls you receive. By following these simple steps, you can protect your phone line from unwanted interruptions. Take control of your privacy today and enjoy a quieter phone experience.